There is something magical about being able to make something practical or beautiful yourself! I love crafting in so many different shapes and sizes – crochet, knitting, vinyl…the list goes on and on.
Studio Adorkable is full of some of the cutest planner supplies I have seen! The artist, Lacey, not only is any amazing artist, but also does a great job of adding action and feeling into her characters! Check out my PR team haul to see what all Studio Adorkable has to offer!
Pick up a set from your favorite show or movie in the Studio Adorkable shop. Use the code Meryisadorkable to get 15% off your order (excludes custom work).
I am part of the Studio Adorkable PR team for this quarter and received this as part of my involvement with the team, but all thoughts and opinions are my own.
Any fiber arts lover knows the call of the yarn aisle. Given that it’s nearly impossible to pass up those beautiful skeins, it’s important to find a way to know just what you have in your stash! In this class you will learn how to quickly inventory your yarn stash with photos and details in Evernote.. for free!
Your yarn stash will be searchable and available to you, no matter where you are thanks to the magic of their mobile app. Never again will you be questioning just what shade and dye lot you needed to complete the project you have on your needles. Not only will you save time (to spend on your next project!), you’ll also save money (to spend growing your stash!). Join this class today and we’ll have your yarn stash organized in no time!
If you’re not familiar, Skillshare is an online learning community with thousands of classes on everything from business to graphic design to fashion – it’s the Netflix of learning. I’ve learned a lot from the courses I’ve joined on Skillshare and I’m excited to become a teacher there.
By using my special link below not only will you be able to enroll in my class, but you’ll also gain access to all other classes on Skillshare for just 99 cents! For three months, you can join any classes that you are interested in, all for less than a dollar.
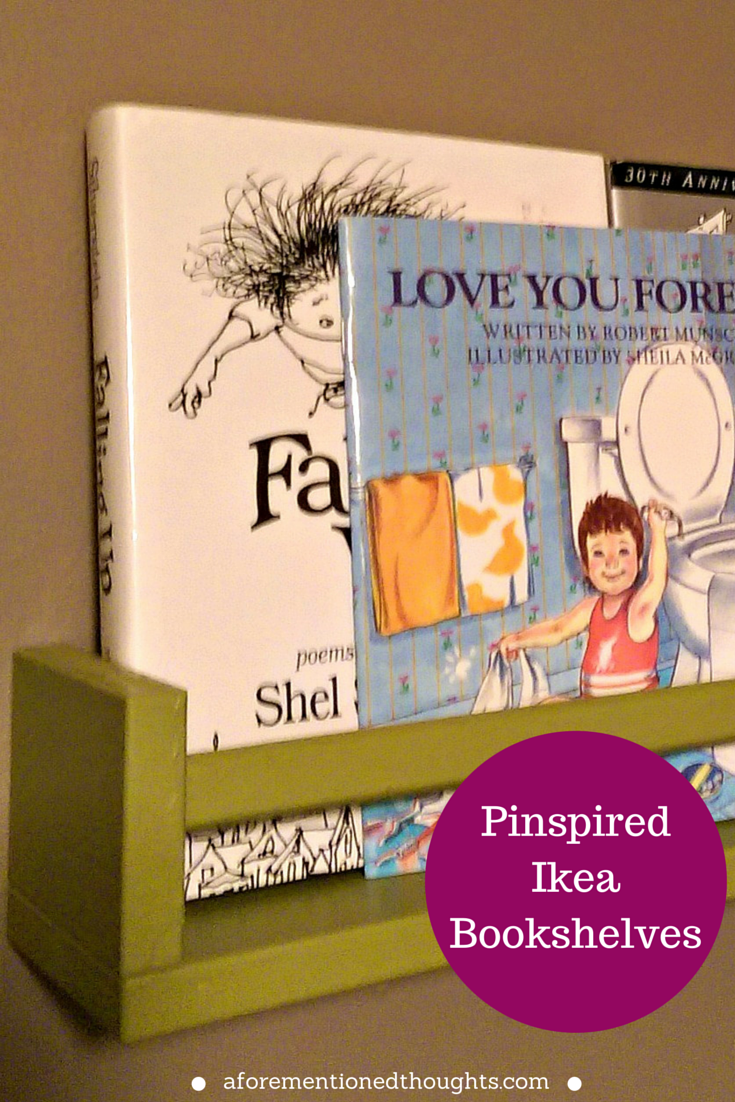
I’ve always been a huge reader (thanks Dad and Mom for reading to me so much as kid and supplying my book habit!) and I feel like my love of reading helped me in so many ways throughout my life. It’s important to me that books an essential part of Little One’s upbringing and I want to make sure she always has books at her fingertips (or at Mommy and Daddy’s fingertips until she’s old enough to enjoy them on her own). Our small rooms don’t accommodate large bookshelves easily, so when I saw this pin, I thought it was a brilliant idea!
Project Time: 1 hour or so Project Cost: approx $5/shelf Pin it or forget it? Pin it!
One of Little One’s aunties (who also purchased the spice racks for us on an Ikea trip) redid my former dresser and chest as her baby shower gift, so we didn’t want to mount the bookshelves directly to the beautiful piece. We decided to make a corner of her room for her books, near the glider where we will likely sit and read to her.
We found some great little paint samples at Lowe’s and picked one up in a bright green to compliment her room colors. I can’t take an credit for the implementation of this project, Hubby did it all from painting, putting them together, and mounting them to the wall. We did have issues mounting them to the wall due to the type of hanging areas on the back of the spice rack, but otherwise I’m really happy with how they turned out! The hold her books well and add a nice little pop of color to the corner area. There’s no way we would have had room for a bookcase right now, so this was a wonderful solution.
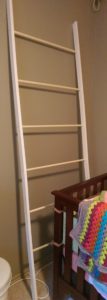
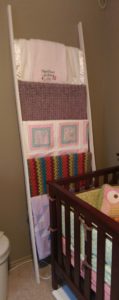
Little One was blessed to receive many blankets in preparation for her arrival, including some beautiful handmade pieces. My mom mentioned an idea like this and I said that I knew I had seen it somewhere before. Funny enough, a few weeks later I was perusing my boards (what, you don’t browse your boards for fun?) and found that I had pinned it at least a year earlier! I explained my idea to the Hubby and thankfully he agreed to make it for Little One’s room.
Project Time: 2-3 hours Project Cost: approx $20 Pin it or forget it? Pin it*
*I will say the Hubby handled this project completely from start to finish and at the end, he wasn’t thrilled how it came out (although I was). So please consider that when deciding to take on the project.
The Hubby made this with two pieces of wood (I’m not sure on the specifics of sizes) and dowel rods. We decided on a nice cream color to paint the sides, since we thought that a color might draw attention away from the beautiful blankets. The rods didn’t need painted since they would be covered.
I love how her blanket ladder turned out! It is one of my favorite pieces in our house. It’s a great display for some of her blankets, adds decoration to her room, and doesn’t take a lot of space. If we had more room, I’d ask the Hubby for another for our blankets… but even 6+ months later I’m not sure he has recovered from making it.
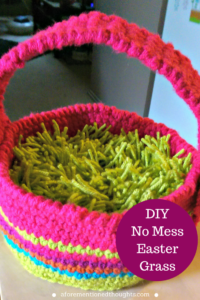
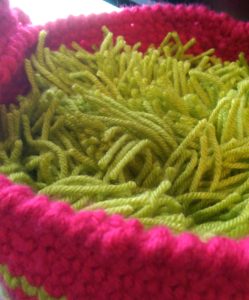
I can’t even decide what the best part of this no-mess Easter grass is!
First, it’s no-mess. No more plasticy strands clinging to everything in sight and showing up weeks after the basket is put away.
While I totally love this lime green color, it can be customized to match the little one’s basket!
It’s reusable! No more spending each year on something that’s just going to go in the trash.
It’s even washable! Have an unexpected melty chocolate in your basket? Throw this grass in a laundry bag and wash it up for next year.
I’ve really loved this Easter grass both years we have used it in our family. This year I created a video to show how to make your own Easter grass. You can see it here:
Original Post:
Do you ever finish a craft project and get super excited because it turned out great? That’s how I felt with my Easter grass project. When I started making Mudpie’s Easter basket I thought “wouldn’t it be cute if I sewed in some yarn ‘grass’?” I contemplated this for awhile and since I’m trying to go with the “let’s not overly complicate something that has already been done” technique I decided to look around and found this post from Lady Behind The Curtain (http://www.ladybehindthecurtain.com/making-grass-from-yarn/) that I based my Easter grass on. I didn’t use the plan exactly but it helped having that idea to go off of. It wasn’t difficult but took much longer than I expected. I kept reminding myself that this is a project that will hopefully last through her young years at least since I get frustrated when projects take longer than expected. When I got all the grass poofs done and in the basket I was so excited. They were the last touch I needed to really love the basket it seems. I’m so happy with how it turned out!
Here’s how to make your own DIY No Mess Easter Grass:
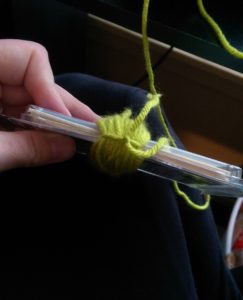
Pick your favorite color acrylic yarn. I used neon green, but I also think hot pink would be super cute. You’ll also need scissors and something to wrap the yarn around. I used a small container of labels I had but an old gift card would be perfect as well.
Hold one end of the yarn and wrap the yarn several times. I found 45 times worked great for me. Cut the end of your yarn.
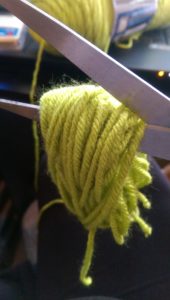
Slide a piece of yarn under your yarn wraps and tie a very tight knot in the middle of your yarn. Do not cut yarn.
Carefully slide wraps off onto your hand. Slide your scissors in the middle of the wraps and cut the loops across from your knot. Hold on to the knot area while doing this if you can.
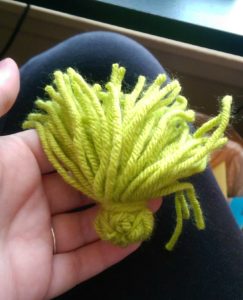
At your knot hold the yarn strands together and wrap the tail of the knot around the bundle around 5 times. Use the other end of the knot tail to tightly knot these threads.
Congrats you’ve made your first Easter grass poof! Now keep going until you have enough Easter grass to cover the bottom of your basket.
I thought that I might try to connect the grass to the bottom of the basket or connect the grass poofs together, but I ultimately opted not to. Since this Easter grass is no mess, I don’t mind if baby girl decides to throw the poofs all about when she gets older. Plus this way I can take out the grass if I need to later for any reason.
What do you think of this DIY Easter grass? Does traditional Easter grass end up in odd places in your house or just mine? Let me know in the comments below!
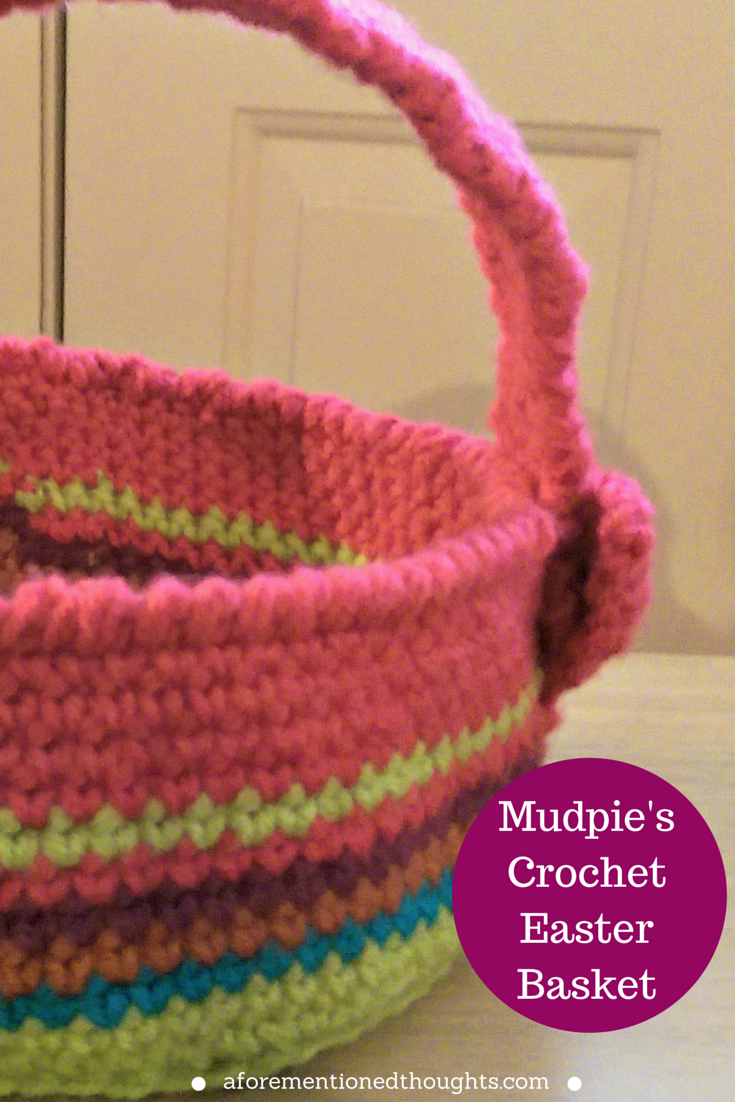
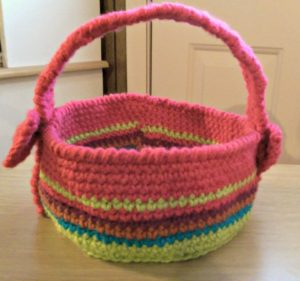
While there are many beautiful Easter baskets on market these days, I knew that I wanted to crochet Mudpie’s first Easter basket for her. I loved the idea of it being her “main gift” this first Easter and something that could be used for several years as she grew. While I probably could have figured out a pattern on my own, I try to remember that it’s silly to reinvent the wheel and set out on my own Easter search.
I found this adorable pattern by Jam made that was just the style I was looking for. I decided to use the yarn I had left over from her baby blanket as the color pallet. I had bought extra of each color to have for other items for her since I think it’s fun that many of her items coordinate.
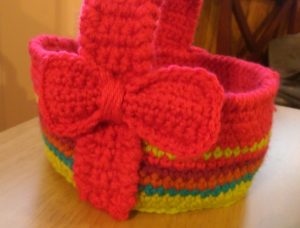
The pattern is simple and delightful to work up. I haven’t worked with two strands of yarn at the same time before, but was surprised to find that it wasn’t nearly as difficult as I thought it would be. Working with two strands created a nice and sturdy basket. The handles are sturdy too, although I find that when lifting it from the handle the basket bends just slightly so I’m thinking about maybe adding a cardboard base next year. For this year it’s fine though. I think the size works well – small but still large enough to fill with goodies or eggs. I even added an extra element not in the pattern that really pushed this project over the edge into “Love!” land for me. I’ll share that and what is going to be in Mudpie’s basket this year a little later in the week, so stay tuned!
When I got to the stage that my friend circle began having babies, I decided I really wanted to have a standing gift that I could give to welcome all the kiddos into the world. It needed to be useful and able to be personalized for each family. And simple because, let’s face it, I don’t do well with complicated projects on a deadline and I’d prefer to give them to the mommas before the baby is born, not on their first birthday!
I decided on crocheting a small baby blanket that could be customized with the baby’s room colors. I make them in cotton or acrylic so that it can be used and washed. Typically I make them from the Tiramisu Baby Blanket pattern, which is a really beautiful pattern, but I have ventured into some different designs as well. I love that I can make the blanket special for each family and pray over that child while I’m crocheting. It makes it feel like I can stitch a little extra love for them.
When I found out I was expecting Little One, I knew she needed to have her own special blanket made by Mommy. I knew she would be getting several baby blankets (and she did get some beautiful ones from people who love her already) so I decided to make her a blanket that will fit her bed when she’s a toddler and will be big enough to wrap around her when she can toddle in to watch tv with Mommy and Daddy on the couch.
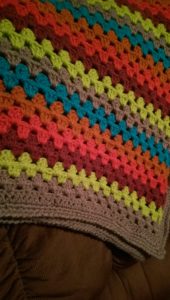
I decided on the Granny Stripe Blanket pattern, since it was a pattern that I’ve been eying for awhile. It was really a wonderful pattern and a joy to make, even at a larger size. I usually get downtrodden about halfway through big projects like blankets, but did not with this pattern. Surprisingly enough, I was even able to get this done before her baby shower!
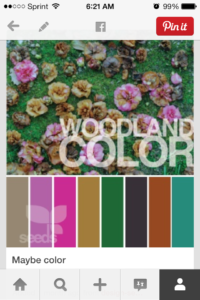
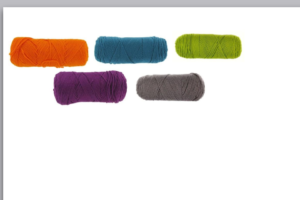
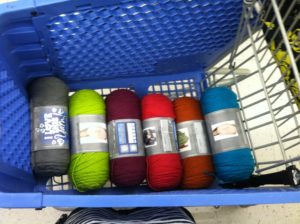
I also took my time picking the colors. This was the first time I’ve really used Pinterest to pin color pallets and narrowing down what I wanted the feel of her room to be like. When I got word that Little One was a she, I finalized my plans and picked out the yarn at Hobby Lobby. They have beautiful colors in “I Love This Yarn” that are reasonably priced and feel nice and soft.
Overall I’m very happy with how it turned out. I’d like the edging to look a little smoother, but I can deal with that. I love the reverse crab stitch that I used on the outermost edging. The colors are bright and remind me of a fun woodland scene, which is what I was going for. Hopefully Little One will like it just as much!