Update:
I can’t even decide what the best part of this no-mess Easter grass is!
First, it’s no-mess. No more plasticy strands clinging to everything in sight and showing up weeks after the basket is put away.
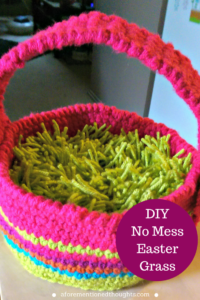
While I totally love this lime green color, it can be customized to match the little one’s basket!
It’s reusable! No more spending each year on something that’s just going to go in the trash.
It’s even washable! Have an unexpected melty chocolate in your basket? Throw this grass in a laundry bag and wash it up for next year.
I’ve really loved this Easter grass both years we have used it in our family. This year I created a video to show how to make your own Easter grass. You can see it here:
Original Post:
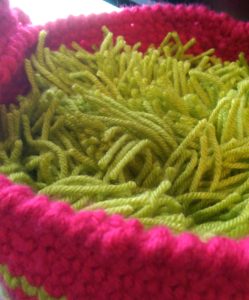
Do you ever finish a craft project and get super excited because it turned out great? That’s how I felt with my Easter grass project. When I started making Mudpie’s Easter basket I thought “wouldn’t it be cute if I sewed in some yarn ‘grass’?” I contemplated this for awhile and since I’m trying to go with the “let’s not overly complicate something that has already been done” technique I decided to look around and found this post from Lady Behind The Curtain (http://www.ladybehindthecurtain.com/making-grass-from-yarn/) that I based my Easter grass on. I didn’t use the plan exactly but it helped having that idea to go off of. It wasn’t difficult but took much longer than I expected. I kept reminding myself that this is a project that will hopefully last through her young years at least since I get frustrated when projects take longer than expected. When I got all the grass poofs done and in the basket I was so excited. They were the last touch I needed to really love the basket it seems. I’m so happy with how it turned out!
Here’s how to make your own DIY No Mess Easter Grass:
Pick your favorite color acrylic yarn. I used neon green, but I also think hot pink would be super cute. You’ll also need scissors and something to wrap the yarn around. I used a small container of labels I had but an old gift card would be perfect as well.
Hold one end of the yarn and wrap the yarn several times. I found 45 times worked great for me. Cut the end of your yarn.
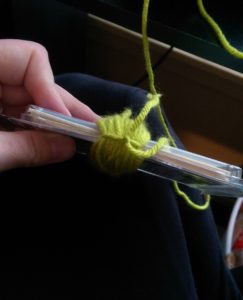
Slide a piece of yarn under your yarn wraps and tie a very tight knot in the middle of your yarn. Do not cut yarn.
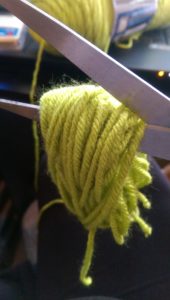
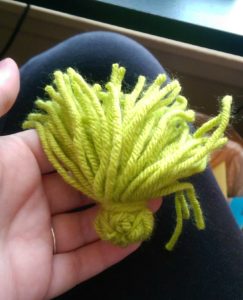
Carefully slide wraps off onto your hand. Slide your scissors in the middle of the wraps and cut the loops across from your knot. Hold on to the knot area while doing this if you can.